Making models and art in digital format is all very well, but sometimes I really miss the tactile aspects of making things and building actual models in real space. During my childhood I spent many hours making model aircraft, mostly 1/72nd scale Airfix kits, and thought that it would be nice to take a trip down memory lane and have a go it again, so, some 32 years later here is my first attempt at modelling.
1/72nd scale Sopwith Pup N6453 as flown by SCO E.H.Dunning DSC (Royal Navy), which was the first aircraft to land on a ship, HMS Furious, on August 2nd 1917. Sadly, Dunning was killed five days later whilst attempting a second landing.
This model is part of a box set commemorating 100 years of Naval Aviation History, being a novice I made my first error in choosing to make my first model of the collection of 5 this very small and fiddly biplane, talk about in at the deep end!
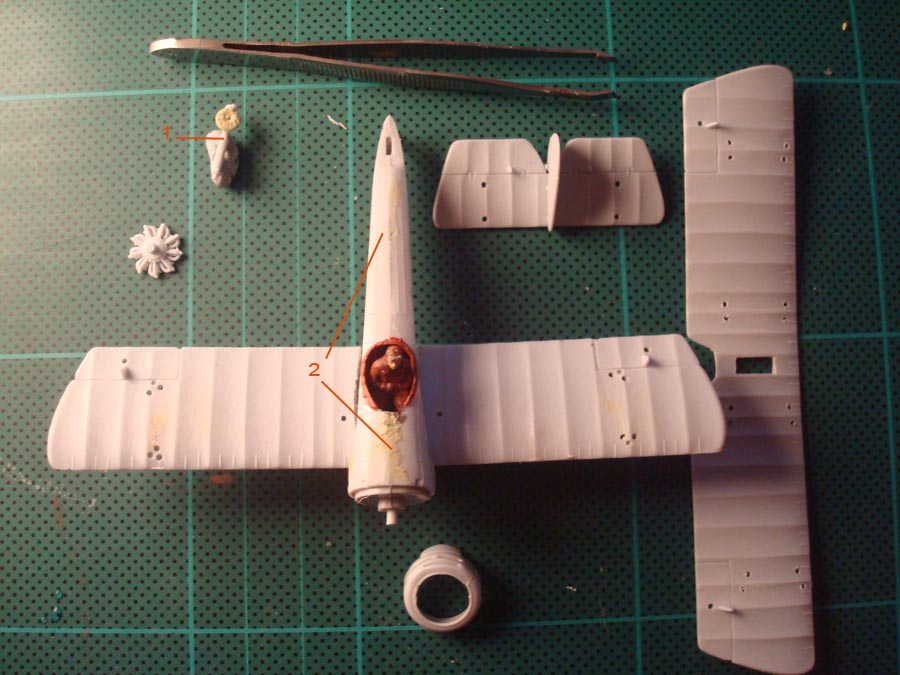
Pic i) Out of the box, I can see that the model needs some modifications to make it more accurate to the actual aircraft.
 1: drilled in holes to accept rigging (not supplied in the kit)
2: This particular pup had an upwards-facing tripod mounted Lewis gun, the model kit came with a front-facing Vickers gun.This yellow blob is the start of me modifying the supplied gun using Milliput.
3: Also using Milliput to make oval inspection panels (kit shows square format)
4:Cut away rear section of fuselage infront of rudder post.
5:Cut away section in top wing to allow for Lewis gun mounting. This configuration was used for shooting at zeppelins.
Pic ii) Assemby and filling.
 1:Vickers gun modified into a Lewis gun (of sorts)
2: filling bad seams and a sunken section on the model
Pic iii) Model with base paint, lower wings, gun and cowling added
 .
.1: carved out step, model only had an outline.
2: engine exhaust added (also missing in model), oval panel cleaned up, sanded and painted.
3: Lewis gun and scratch built tripod mount added.
Pic iv) Top wings and tailplane sections added and taped whilst drying.

1: note holes drilled for rigging, this proved almost impossible to fill and sand flat afterwards, next time I will try a different approach.
2: horrible misalignment of cabane strut.. will deal with it later!
Next stages included rigging, painting, varnishing and adding decal markings, propeller and undercarriage, but my camerawork let me down and I managed to shoot only blurry photos of that.. doh!
So we have a small (but probably thankful for all our sakes) jump to the finished thing.

In retrospect I would do things a bit differently, the rigging is not to the correct scale, I have to do some testing with different techniques and materials to get better results. I would not drill all the way through the upper wing, as it was difficult to remove the resulting glue and filler lumps without destroying surface details. I would also try to use thinner coats of paint and a different varnish (the matt one I used dried with milky patches for some unknown reason).
Overall though I am 80% happy with the end result, considering that it is such a small, delicate and fiddly model to start off the project with (only 11.5 cms wingspan). Build time 4 evenings,16 hours total. Next in line on the bench is a Fairey Swordfish.


No comments:
Post a Comment